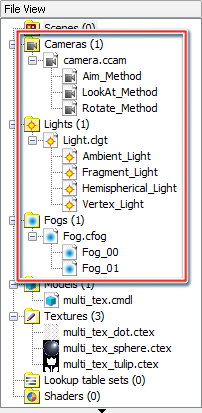
Scenes provide a numbered way to manage environments (camera, light, fog) configured with 3DEditor.
You can use these managed cameras, lights and fogs linked to the editing of material properties.
Note: Lights are managed as light sets, not as individual lights.
This section describes the process flow from the registration of Camera, Light and Fog to the created scene, through to the checking with the Viewer after the editing of material properties.
Open the Right-click menu on Scene in Field View and select Create a New Scene File (.cscn file).
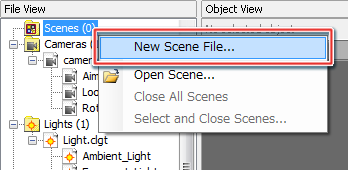
This opens a dialog to create a Scene file, so enter a name for the file and then press OK.
When you press OK, a Scene file with the entered name is created and displayed in File View.
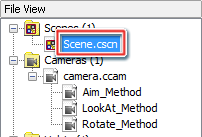
Create a scene for the registration of Camera, Light and Fog in the created Scene file (the (.cscn file).
Note: You can not register the various environments (Camera, Light, Fog) merely by creating a new Scene file.
Open the Right-click menu on the newly created Scene file and select Create a New Scene.
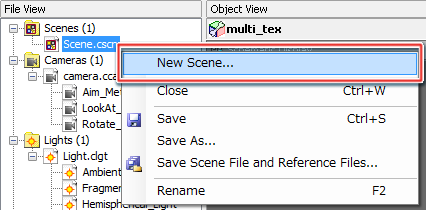
This opens a dialog to create a scene, so enter a name for the scene and then press OK.
When you press OK, a scene with the entered name is created and displayed in File View.
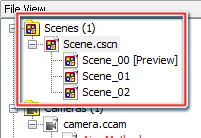
Note: You can create multiple scenes in a Scene file.
If a scene is being used in the Viewer, the display of its file name is followed by [Preview] in the File View window.
Use the Right-click menu to toggle between using and not using the scene in Viewer.
Register Camera, Light and Fog to the create scene.
Double-click on the scene you want to edit in File View or in Object View to open the Property window and edit the following items.
(1) Select Camera from among the scene's properties and click Add.
When you click the button, the Add Camera dialog opens and displays the list of cameras that have been loaded to 3DEditor.
(2) Set a number for the camera being registered to the scene.
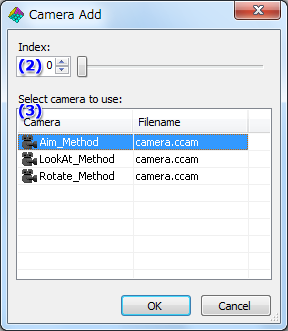
(3) From the displayed list of cameras, select a camera to register to the number you set in step 2 and then press OK.
When you press OK, the Add Camera dialog closes and the added camera displays in the list of cameras in the Property window.
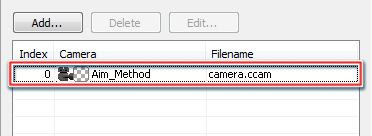
Note: To register more than one camera, repeat steps 1-3.
Just note that you cannot set multiple cameras to the same number.
(1) Select Light Set from among the scene's properties and click Add.
Pressing the Add button opens a dialog for adding a light set.
When registering lights to a scene, you register a light set, and not individual lights.
(2) Set a number for the light set being registered to the scene.
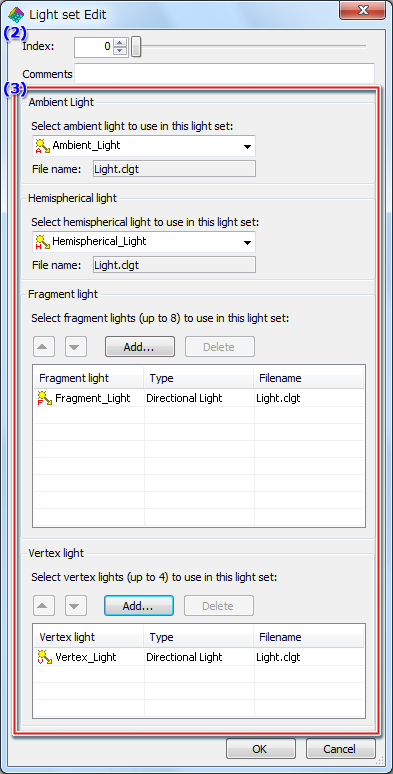
(3) Configure the Ambient Light, Hemispherical Light, Fragment Light and Vertex Light for the light set being registered and then press OK.
When you press OK, the Add Light Set dialog closes and the added light set displays in the list of light sets in the Property window.

Note: To register more than one light set, repeat steps 1-3.
Just note that you cannot set multiple light sets to the same number.
(1) Select Fog from among the scene's properties and click Add.
When you click the button, the Add Fog dialog opens and displays the list of fogs that have been loaded to 3DEditor.
(2) Set a number for the fog being registered to the scene.
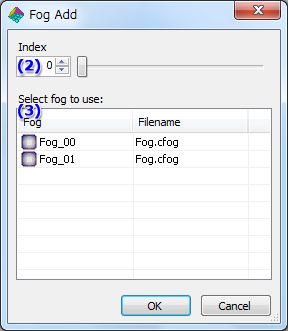
(3) From the displayed list of fogs, select a fog to register to the number you set in step 2 and then press OK.
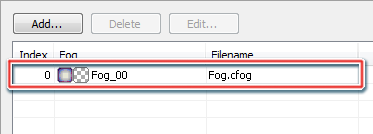
When you press OK, the Add Fog dialog closes and the added fog displays in the list of fogs in the Property window.
Note: To register more than one fog, repeat steps 1-3.
Just note that you cannot set multiple fogs to the same number.
Configure the registered Camera, Light Set and Fog to a material and check using the Viewer.
(1) Double-click on a selected material in Object View.
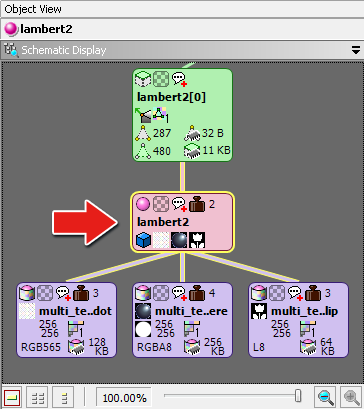
(2) The material Property window opens, so configure here the Camera, Light Set and Fog that were registered to the scene.
(2) Select the Texture item in the material Property window.
(2) In the texture coordinator part, set a camera that was registered to the scene as the camera to use for projection.
This projection camera setting can be configured by changing the number or via the Select Camera dialog.

Note: The specification for the projection camera is only valid when the mapping method is projection mapping.
If you change the number to a number that was used for camera registration, the camera associated with that number will be used.
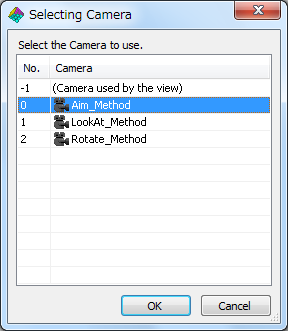
Click on the Select File icon in the settings for the Projection Camera to open the Select Camera dialog.
Select which camera to use for the material and press OK.
When the above setting is configured, the camera registered to the scene is used as the camera for projecting the material.
| Key Operations | Description |
|---|---|
| R Button + A Button | Switches the View camera. When the View camera is switched, the operating cameras and lights also switch. |
| R Button + X Button | Switches the operating cameras and lights. |
To learn about Viewer operation methods, read this.
Change and configure the light sets registered to scenes.
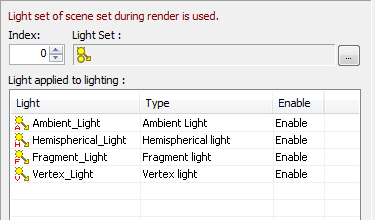
(1) Select Light Set in the material Property window.
Selecting Light Set displays the information about the scene's light sets that are configured at the time of rendering.
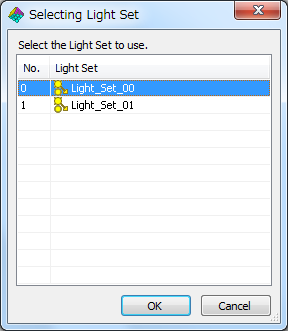
(2) Change the number of the light set, or select a light set for use from the Select Light Set window.
If you change the number to a number that was used for light set registration, the light set associated with that number will be used.
Click on the icon for selecting a Light Set file to open the Select Light Set dialog.
Select which light set to use for the material and press OK.
When the above configuration is made, the light set registered to the scene is used for the material.
| Key Operations | Description |
|---|---|
| R Button + A Button | Switches the View camera. When the View camera is switched, the operating cameras and lights also switch. |
| R Button + X Button | Switches the operating cameras and lights. |
To learn about Viewer operation methods, read this.
(1) Select Fog in the material Property window.
Selecting Fog displays the settings for the scene's fogs that are configured at the time of rendering.
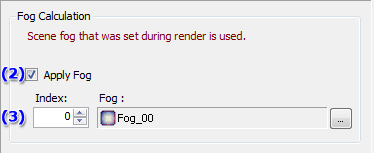
(2) Mark or clear the checkbox to toggle whether or not to apply Fog to the material.
(3) Change the number of the Fog, or select a Fog for use from the Select Fog window.
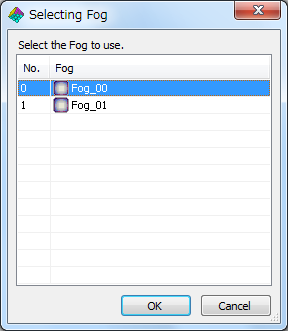
If you change the number to a number that was used for Fog registration, the Fog associated with that number will be used.
Click on the icon for selecting a Fog file to open the Select Fog dialog.
Select which Fog to use for the material and press OK.
When the above configuration is made, the fog registered to the scene is used for the material.
| Key Operations | Description |
|---|---|
| R Button + +Control Pad (Left/Right) | Changes the operating cursor items. Items: Resource name: Switches the selected model/scene. Animation name: Changes the displaying animation. Animation frame: Steps the model/scene animation forward/backward by the playback-rate number of frames. Playback rate: Increases/decreases the animation playback rate. |
| L Button + R Button + +Control Pad (Left/Right) | Increases/decreases the values of operating cursor items for just the selected model/scene. Items: Animation frame: Steps the selected model/scene animation forward/backward by the playback-rate number of frames. Playback rate: Increases/decreases the selected model/scene animation playback rate. |
To learn about Viewer operation methods, read this.
CONFIDENTIAL