This section describes how to use the Animation Set features to combine model animations for playback.
The NintendoWare package contains the following sample data, located as shown below. Load this sample data into 3DEditor and connect to the Viewer.
%NW4C_ROOT%/SampleData/Graphics/Intermediate/ProgramResource/Male
Male.cmdl (Model)RedFading.cmata (Material animation)Run.cskla (Skeletal animation)To load the files, select File > Open from the menu or drag & drop the files.
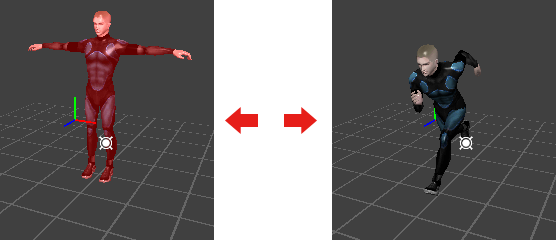
By connecting to the Viewer, the loaded sample data will display.
Switch the animation on the Viewer to separately play RedFading.cmata and Run.cskla.
This is how to use the system Controller.
| Key Operations | Description |
|---|---|
| Slide pad | The camera rotates around the viewpoint. |
| +Control Pad Up/Down | Slides along the world y-axis. |
| +Control Pad Left/Right | Slides along the world x-axis. |
| Lower screen (right side 4/5)(Touch panel) | Slides in the camera's XY direction. |
| Lower screen (left side 1/5)(Touch panel)(up/down) | Slides along the world y-axis. |
| X Button or Y Button | Moves closer toward the look-at point (X Button). Moves further away from the look-at point (Y Button). |
| L Button + Slide pad | Slides along a plane parallel to the world XZ plane. |
| L Button + Lower screen (right side 4/5)(Touch panel) | Tilts the camera. |
| L Button + Lower screen (left side 1/5)(Touch panel)(up/down) | Slides along the world y-axis. |
| L Button + X/Y Button | Advances toward the look-at point (the look-at point moves at the same time) (X Button) Recedes in the opposite direction of the look-at point (the look-at point moves at the same time) (Y Button) |
| L Button + START/SELECT Button | Resets the camera position to its initial state. |
| R Button + A Button | Switches the View camera. When the View camera is switched, the operating cameras and lights also switch. |
| R Button + X Button | Switches the operating cameras and lights. |
| Key Operations | Description |
|---|---|
| A Button | Starts/stops playback of all displayed model/scene animations. |
| B Button | Stops all model or scene animations being displayed and resets to frame 0. |
| R Button + Y Button | Switches the selected model/scene. |
| L Button + R Button + X Button | Switches the selected model/scene animation. |
| L Button + R Button + A Button | Starts/stops playback of the selected model/scene animation. |
| L Button + R Button + B Button | Stops the selected model/scene animation and resets the frame to 0. |
| R Button + +Control Pad (Up/Down) | Moves the position of the operating cursor. Moves in the following order: resource name, animation name, animation frame, playback rate. |
| R Button + +Control Pad (Left/Right) | Changes the operating cursor items. Items: Resource name: Switches the selected model/scene. Animation name: Changes the displaying animation. Animation frame: Steps the model/scene animation forward/backward by the playback-rate number of frames. Playback rate: Increases/decreases the animation playback rate. |
| L Button + R Button + +Control Pad (Left/Right) | Increases/decreases the values of operating cursor items for just the selected model/scene. Items: Animation frame: Steps the selected model/scene animation forward/backward by the playback-rate number of frames. Playback rate: Increases/decreases the selected model/scene animation playback rate. |
| R Button + START/SELECT Button | Toggles the looped playback feature on/off for one-time animations. |
| Lower Screen (Lower part)(Touch panel) | Operates the animation slider bar. |
Note: To read about Viewer operations in more detail, select Help > Viewer Help from the 3DEditor main menu.
Right-click on Male.cmdl displayed in File View and select Create Animation Set.
This opens the dialog for creating an animation set. Enter Run as the name.
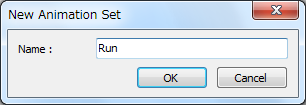
When you press OK, the animation set named Run gets created in the child hierarchy for Male.cmdl, so now drag & drop RedFading.cmata and Run.cskla to there.

Note: When you conduct the drag & drop operation a dialog displays to confirm the action. You can perform the operation without this dialog displaying by holding down the Shift key while dragging and dropping.
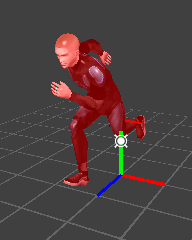
Once RedFading.cmata and Run.cskla have been moved to the Run animation set, the animation shown in the Viewer switches to Run.
In the Viewer you can confirm that RedFading.cmata and Run.cskla play at the same time.
Load the following animations into 3DEditor:
%NW4C_ROOT%/SampleData/Graphics/Intermediate/ProgramResource/Male
RunUpper.cskla (Skeletal animation)WalkLower.cskla (Skeletal animation)Create a new animation set named RunWalk and then register RunUpper.cskla and WalkLower.cskla.
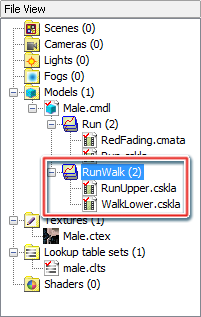
By switching the animation shown in the Viewer to RunWalk, you can confirm that the two skeletal animations play at the same time.
This section explains how to register one animation to a number of animation sets.
While pressing the Ctrl key, click on the animation RedFading.cmata that is registered in the Run animation set and drag & drop it to the RunWalk animation set.
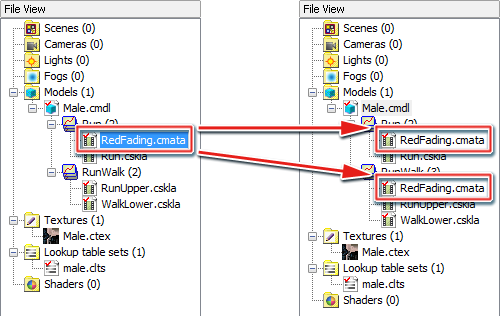
By moving a file while depressing the Ctrl key, you can register a single animation to multiple animation sets.
By switching the animation shown in the Viewer to RunWalk, you can confirm that a red light blinks (the animation of RedFading.cmata) while the two skeletal animations play at the same time.
When you save Male.cmdl, the animation sets also get saved, and the next time you open Male.cmdl the animations sets will be loaded automatically.
CONFIDENTIAL