Compositing Textures
CreativeStudio can combine loaded textures and edit textures using multi-UV.
This section describes how to load two textures into CreativeStudio, combine them, and then apply the combined result to a sample model.
Creating a Sample Model
On the CreativeStudio menu, select Create → Sample → Cube model to create a sample model.
Loading Textures
Load textures into CreativeStudio for compositing.
In this example, we use the following two textures.

On the CreativeStudio menu, select File → Open → Intermediate File to load the following texture intermediate files.
| Intermediate File | Location |
|---|---|
| Chess piece | " %NW4C_ROOT%/SampleData/Graphics/Intermediate/texture_combiner_sample/foreground_black.ctex " |
| Field of flowers | " %NW4C_ROOT%/SampleData/Graphics/Intermediate/texture_combiner_sample/background.ctex " |
Texture intermediate files can be created using a 3DCG tool or Photoshop with NintendoWare plug-ins installed.
Adding Textures
You can add a loaded texture to a material.
Select a material displayed in the Content panel to open the material Properties panel.

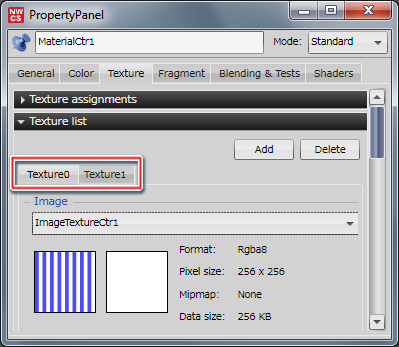
Select the Texture tab on the material Properties panel. Press Add under Texture list. A tab for Texture1 will appear.

Applying a Texture
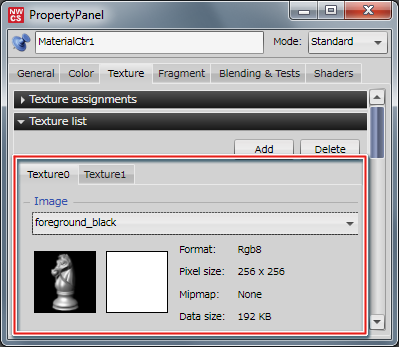
Open the pull-down menu under Image. Textures currently loaded into CreativeStudio will be displayed.

Select the texture to be added.
For now, select the following textures.
Texture0 tab: foreground_black.ctex
Texture1 tab: background
When you select a texture, the texture image and associated information are displayed.
Making the settings above allows textures added to the material to be used.
Delete
Press Delete to delete the most recently added Texture tab.
Changing Textures
This section describes how to change the texture used by a material to another texture.
On the material Properties panel, select the Texture tab to be changed.
Open the image pull-down menu and select the texture to be changed.

Change the image to the selected texture.

The texture is now changed.
You can check that you have switched to the selected texture on the Preview panel.
Combiner Settings
Use the Fragment tab on the material Properties panel to add the two textures together.

For details on the texture combiners, click here.
Make the following settings under Combiner 0 color.
| Setting | Settings | Description |
|---|---|---|
| Formulas | A + B | Sets the sources to use as input to the formula and how they will be processed. |
| A: Source 0 | Texture 0 | Sets component A to be used by the formula from the pulldown menu. |
| B: Source 1 | Texture 1 | Sets component B to be used by the formula from the pulldown menu. |
| C: Source 2 | This is not used here. | Sets component C to be used by the formula from the pulldown menu. |
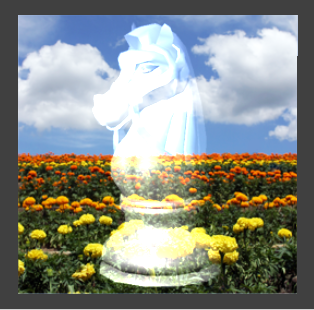
These settings will add the two textures to the sample model and show them in the Preview display.
Multi-UV Settings
Here, use the use the Texture coordinator section of the Texture tab on the material Properties panel to configure two separate sets of UV data (multi-UV).
Multi-UV is when one polygon model is assigned multiple texture UV coordinates.
You can use the coordinators to set the texture mapping method and the UV coordinate scale, rotation, and translation.
Use a 3DCG tool to prepare a polygon model with multi-UV settings, then use NW4C Export to produce an intermediate file, and load that file into CreativeStudio.
Open the material panel, and check that the UV set values using the coordinators match the values below.
- UV set 0 used by Texture coordinator 0
- UV set 1 used by Texture coordinator 1
Change the settings for Combiner 0 color and Combiner 1 color as shown below.
| Combiner 0 color Settings | Settings |
|---|---|
| Formulas | ( A × B ) + C |
| A: Source 0 | Texture 0 |
| B: Source 1 | Primary color |
| C: Source 2 | Secondary color |
| Combiner 1 color Settings | Settings |
|---|---|
| Formulas | A × B |
| A: Source 0 | Result output by previous stage |
| B: Source 1 | Texture 1 |
| C: Source 2 | -- |
Note: With this configuration, you cannot use Combiner 1 color slot 2.
After configuring the settings as above, use the Preview panel to check the two textures using multi-UV in the model loaded from a 3DCG tool.